Here's how to upload files into your CRM:
Custom file fields:
- Not sure how to create a custom field field? Learn how to create fields here.
- Click to edit either the contact or pipeline where the field exists.
- Click the link to upload a file from your computer, or drag-and-drop the file directly into the field, and save.
- Please note: there is a maximum file upload size of 50 MB. Files larger than 50 MB cannot be uploaded.
Contact records:
- Go to the contact, mouse over "Attach an item" and select the "File" option.
- Click to upload a file from your computer, or drag-and-drop the file directly into the window.
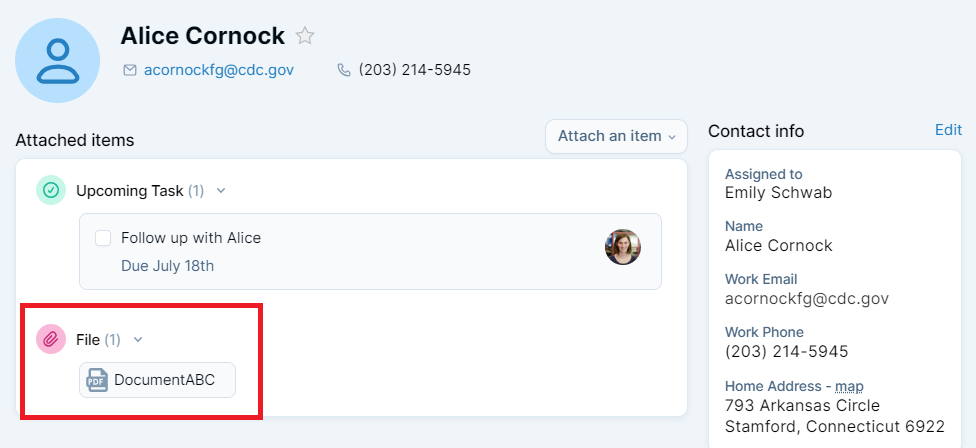
- Attached files will display under the contact's "Attached items" section.
- Please note: there is a maximum file upload size of 50 MB. Files larger than 50 MB cannot be uploaded.
Actions to take on files:
- Click the file tag on the contact or in a specific field to interact with the file.
- Click "Download" to download the file to your computer.
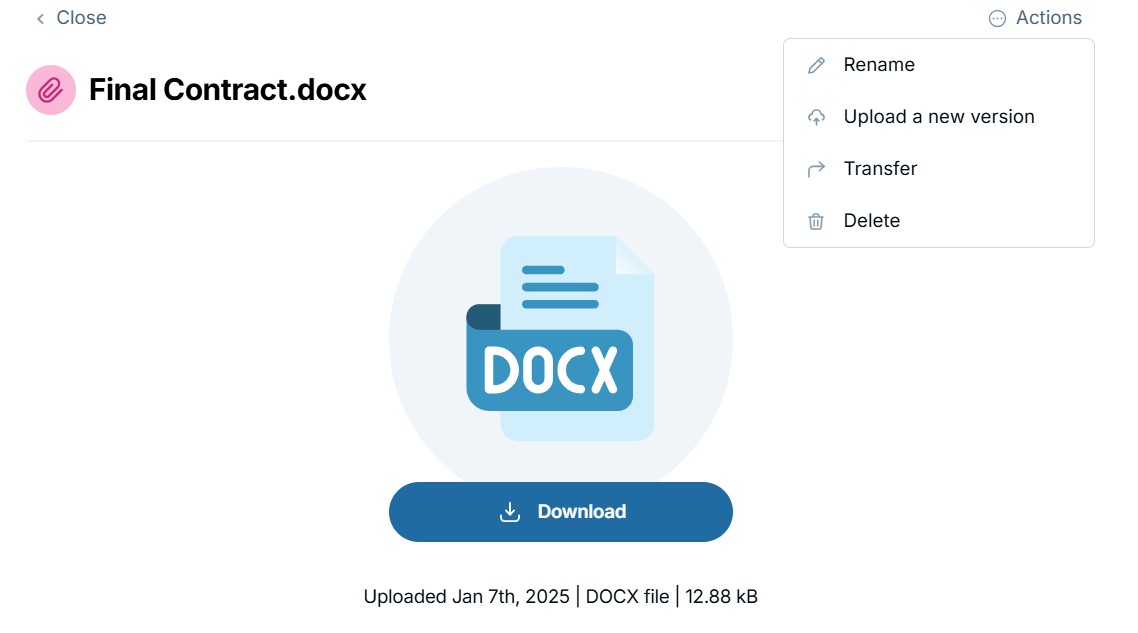
- Click "Actions" in the top right corner of the dialogue for additional options.
- "Open in browser" lets you view the file in a new tab (only available for PDFs and images).
- "Rename" lets you change the name of the file.
- "Upload a new version" lets you update your file, while preserving the old versions.
- "Transfer" allows you to transfer the file from one contact to another. Note that this option is only available for files uploaded to a contact.
- "Delete" lets you delete the file from your CRM.
File Versioning:
- Upload newer versions of a file while preserving older versions, too.
- Click on the file tag, select "Actions," and select "Upload a new version."
- Upload the newest file version from your computer.
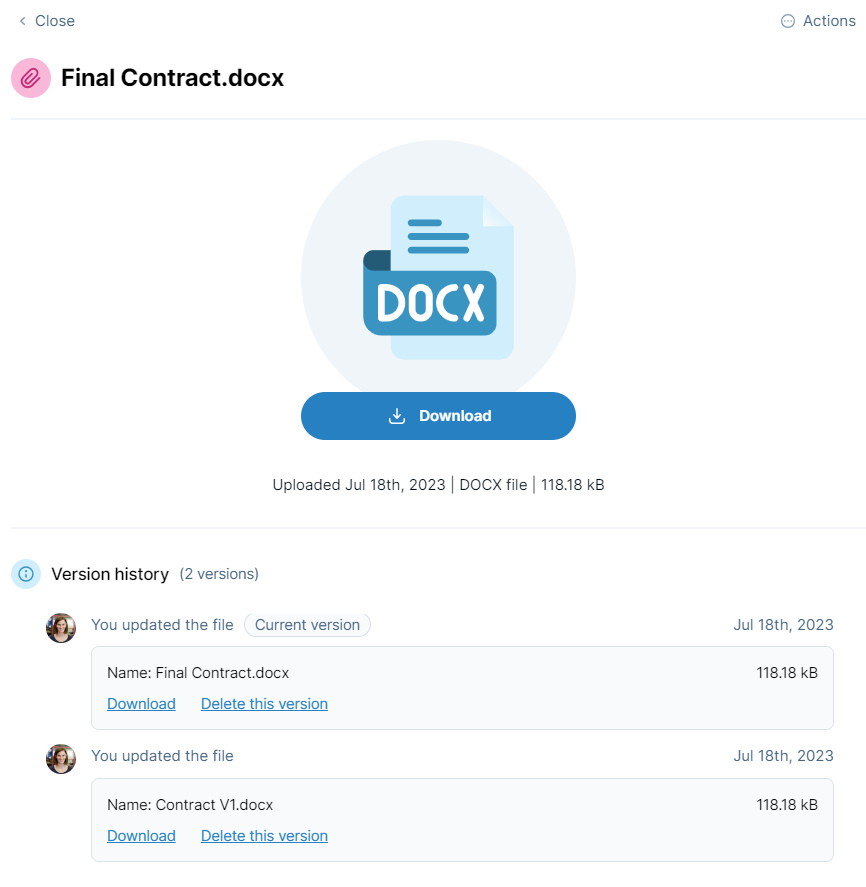
- The file dialog will now display all versions of that file.
Uploading a file to a field
You can upload a file to a custom field directly. This option is best if you’ll need to filter by whether you have this document or not, or if you have certain required documents you need to collect. In order to use this option, you must first have a custom file field created. You can learn more about creating custom fields here.
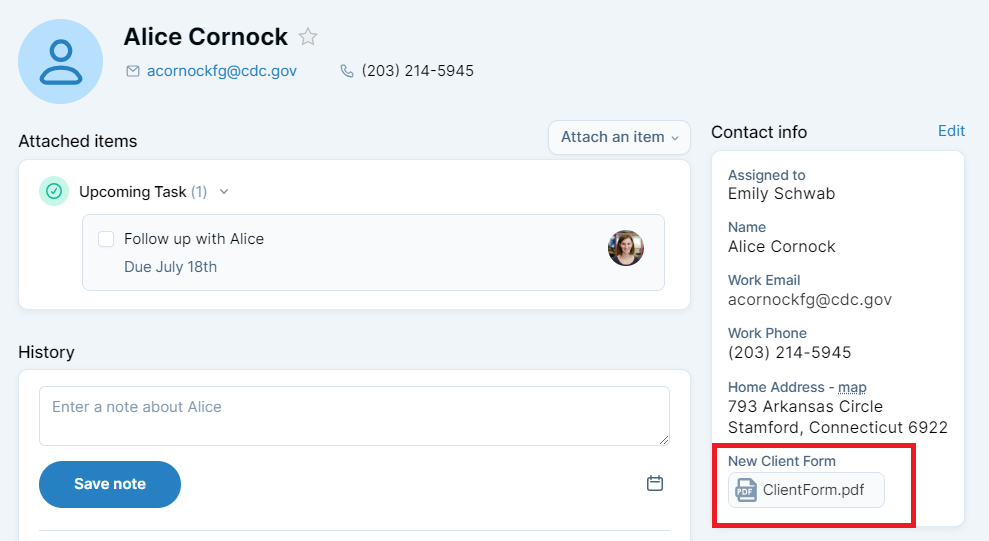
To upload a file to a custom file field, you’ll first need to edit the area where that field exists. This might mean editing the contact or company, or it might mean editing a pipeline item. Once you’ve selected to edit, you can click the link to upload a file from your computer, or drag-and-drop the file directly to upload it.
After you select the file from your computer, or drag-and-drop it, you may see a loading bar momentarily before the file appears. Large files will take longer to upload, so you may see the loading bar for longer if you upload a large file.
Once the file upload is complete, a file tag will appear within the field. By default, the file will be displayed by its file name, so you may find it easier to name files appropriately before uploading. You can also rename the file in the system after upload if you'd prefer.

Uploading a file to a contact/company record
You can upload a file to a contact or company record directly. This option is best for more general files, or files that are collected in a less structured or consistent way.
To start, go to a contact or company record directly. Just below and slightly to the right of the record name is an option “Attach an item.” You can mouse over that, and then select “File” from the dropdown.
A dialog will appear with an option to select the file from your computer, or drag-and-drop the file. After you select the file from your computer, or drag-and-drop it, you may see a loading bar momentarily before the file appears. Large files will take longer to upload, so you may see the loading bar for longer if you upload a large file.
Once the file upload is complete, the file will show on the contact or company's profile near the top of the screen. By default, the file will be displayed by its file name, so you may find it easier to name files appropriately before uploading. You can also rename the file in the system after upload if you'd prefer.

Renaming, opening, and deleting files
To interact with a file, simply click on the file tag (either on the contact/company or in a specific field). Some types of files can be viewed without downloading, and will show a preview image of the file in the dialog that opens; other files will show an icon based on the file type instead.
The dialog that opens will show the file name, and include a few options. You can select “Open” to view the file in a new tab (you will not be able to edit the file in this view). This option is only available for some file types, like PDFs and images, so it may not always appear. You can select the “Download” option to download your file. The file will be immediately downloaded to your hard drive. You can change where downloaded files are saved on your system in your browser's settings.
If you select "Actions" in the top right of the dialogue, you'll see other options. You can select “Rename” to change the name of the file. Simply enter a new name in the field that appears, and then save it. You can select “Transfer” to move the uploaded from one contact to another. This option will only be available for files uploaded to a contact directly, it is not an option for a file uploaded to a field. You can also remove files by clicking the “Delete” option.

File versioning
Sometimes you need to upload a new version of a file, but you don't want to lose your older draft. No problem! Less Annoying CRM supports file versioning.
To get started, click on a file tag, and select "Actions" in the top right corner of the dialogue. In the menu that opens, select “Upload a new version." You will be prompted to select the new version from your hard drive.
Once you have uploaded your new version, the file dialog will show a version history. The version history will show older versions of the uploaded file, as well as some details like the file name, who uploaded the file, the upload date, and the file size.
To open older versions of the file, just click the “Download” link below that older version. You can also select “Delete this version” to remove older versions to reduce clutter.


Can't find what you're looking for?